 MQTT读取温湿度
# Smart之MQTT读取温湿度
# 1. 说明
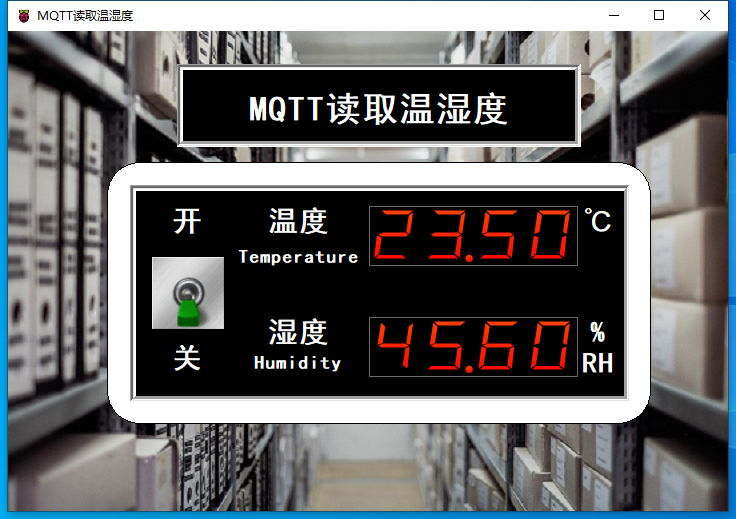
采用MQTT通讯协议,读取驳接在Arduino上的DHT22温湿度传感器的数据。MQTT是由IBM开发的通讯协议,为传感器提供一个轻量可靠的二进制通信设定,使得开发MQTT与物联网,机器之间的通信变得非常简单。
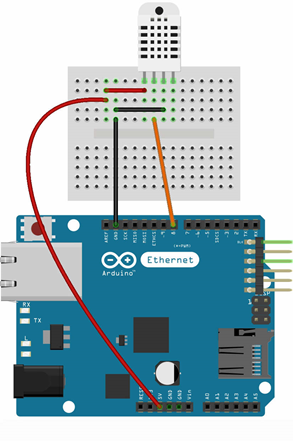
TARS中也提供了MQTT服务,使用TARS中的该服务可以实现设备之间的相互连接。在范例中Arduino开发板与Ethernet W5100网络扩展板,组装方式与前述章节相同。温湿度传感器DHT22,负极接Ethernet W5100扩展板的GND针脚,正极接扩展板5V针脚,信号线接扩展板D8针脚。
通过范例学习,可以掌握MQTTClient控件的基本使用,并结合arduino开发板通过MQTT进行温湿度采集。
# 2. 零件连接图
# 3. 使用零件
| 序 | 零件名称 | 数量 |
|---|---|---|
| 1 | Arduino UNO R3 开发板 | 1 |
| 2 | Arduino Ethernet W5100 网络扩展板 | 1 |
| 3 | DHT22温湿度 模块 | 1 |
| 4 | USB数据线 | 1 |
| 5 | 面包板 | 1 |
| 6 | 杜邦线 | 若干 |
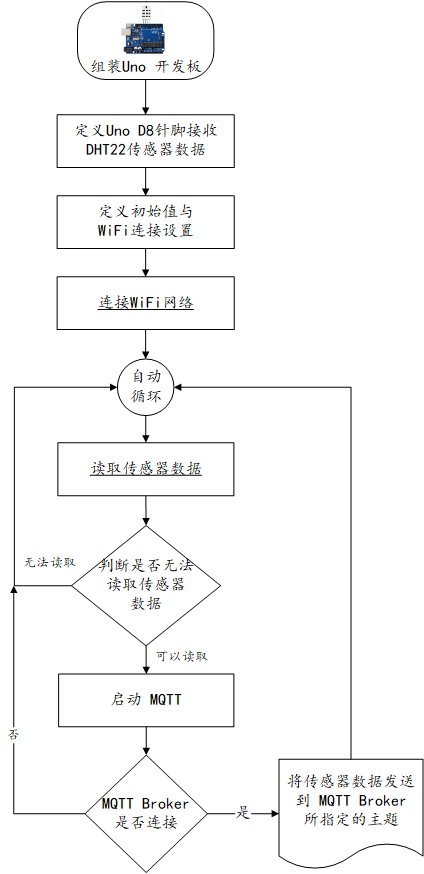
# 4. Arduino流程图
# 5. Arduino程序
使用Arduino IDE 编译并上传以下Arduino程序。
// pubsubclient MQTT 链接库网址  https://github.com/knolleary/pubsubclient
// 使用温湿度传感器之链接库 https://github.com/adafruit/DHT-sensor-library

#include <DHT.h>
#define dhtPin 8                    //读取DHT22 Data
#define dhtType DHT22               //选用DHT22
DHT dht(dhtPin, dhtType);       // Initialize DHT sensor

#include <SPI.h>
#include <Ethernet.h>
// MQTT 宣告 ========================================================
#include <PubSubClient.h>
EthernetClient ethClient;
PubSubClient client(ethClient);


// 设置网络IP地址 (网络扩充卡 MAC 可自行修改 +1 避免冲突)
byte mac[] = {0x90, 0xA2, 0xDA, 0x0E, 0x94, 0xB9 };
IPAddress ip(192, 168, 0, 165);
IPAddress gateway(192, 168, 0, 1);
IPAddress subnet(255, 255, 255, 0);

void setup() {
   Serial.begin(9600);                                   //设定通信速率9600
   dht.begin();                                           //启动DHT

   //设置 MQTT ========================================================
   client.setServer("192.168.0.176", 1883);                 // 连接 MQTT Broker
   client.setCallback(subscribeReceive);                            // 设置从 MQTT Broker读取主题之后,自动运行之副程序

   Ethernet.begin(mac, ip, gateway, subnet);               // 启动网络
   Serial.println("网络已经开通");

   delay(1500);
 }

void loop() {
   float h = dht.readHumidity();   //读取湿度
   float t = dht.readTemperature(); //读取摄氏温度
   if (isnan(h) || isnan(t)) {
      Serial.println(" 无法从DHT传感器读取!");
      return;
   }

  if (!client.connected()) {                              // 如果未联机 MQTT Broker 将重新联机
     reconnect();
  }
   client.loop();

   // MQTT 开始运作发送主题 传送温湿度到 MQTT Broker
   char tmp[20];
   char hum[20];
   dtostrf(t,3,2,tmp);                 // 将Float 转换为 char[]
   dtostrf(h,3,2,hum);
   Serial.println(tmp);
   Serial.println(hum);
   // MQTT 发送主题(温湿度) =================
   client.publish("TMP", tmp);
   client.publish("HUM", hum);
   delay(5000);
}

void reconnect() {
  // 一直循环直到连上 MQTT Broker
  while (!client.connected()) {
    Serial.print("正在连接 MQTT Broker...");
    if (client.connect("arduinoClient")) {
      Serial.println("MQTT Broker 已经连接上");
      client.subscribe("#");

    } else {
      Serial.print("联机失败, rc=");
      Serial.print(client.state());
      Serial.println("五秒钟之后再联机");
      delay(5000);
    }
  }
}

void subscribeReceive(char* topic, byte* payload, unsigned int length)
{
  // Print the topic
  Serial.print("Topic: ");
  Serial.println(topic);

  // Print the message
  Serial.print("Message: ");
  for(int i = 0; i < length; i ++)
  {
    Serial.print(char(payload[i]));
  }

  // Print a newline
  Serial.println("");
}
2
3
4
5
6
7
8
9
10
11
12
13
14
15
16
17
18
19
20
21
22
23
24
25
26
27
28
29
30
31
32
33
34
35
36
37
38
39
40
41
42
43
44
45
46
47
48
49
50
51
52
53
54
55
56
57
58
59
60
61
62
63
64
65
66
67
68
69
70
71
72
73
74
75
76
77
78
79
80
81
82
83
84
85
86
87
88
89
90
91
92
93
94
95
# 6. 设计明细
开启Smart智慧控制平台,分别加入下插图之控件。或者通过点击菜单栏[文件]-[打开项目]选择范例项目文件来打开该范例。
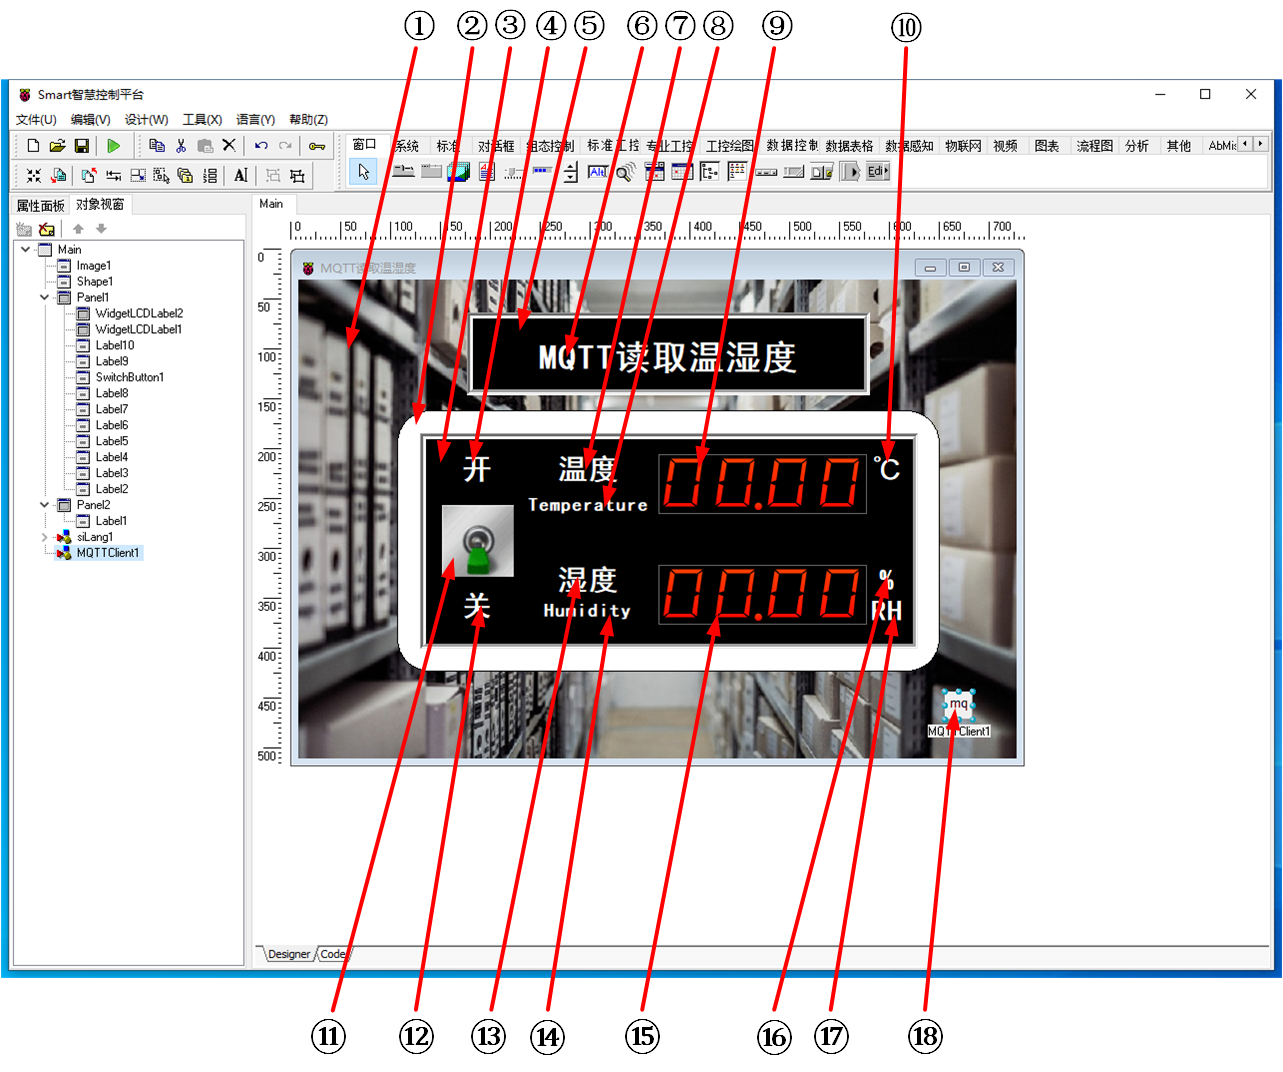
①:TImage组件,控件名称为Image1。
②:TShape组件,控件名称为Shape1。
③:TPanel组件,控件名称为Panel1。
④:TLabel组件,控件名称为Label9。
⑤:TPanel组件,控件名称为Panel2。
⑥:TLabel组件,控件名称为Label1。
⑦:TLabel组件,控件名称为Label2。
⑧:TLabel组件,控件名称为Label3。
⑨:TWidgetLCDLabel组件,控件名称为WidgetLCDLabel1。
⑩:TLabel组件,控件名称为Label4。
(11):TSwitchButton组件,控件名称为SwitchButton1。
(12):TLabel组件,控件名称为Label10。
(13):TLabel组件,控件名称为Label5。
(14):TLabel组件,控件名称为Label6。
(15):TWidgetLCDLabel组件,控件名称为WidgetLCDLabel2。
(16):TLabel组件,控件名称为Label7。
(17):TLabel组件,控件名称为Label8。
(18):TMQTTClient组件,控件名称为MQTTClient1。
Main窗体属性设置
Caption:主窗体标题,设置为MQTT读取温湿度。ClientHeight:窗体客户区高度=480。ClientWidth:窗体客户区宽度=720。
①Image1属性设置
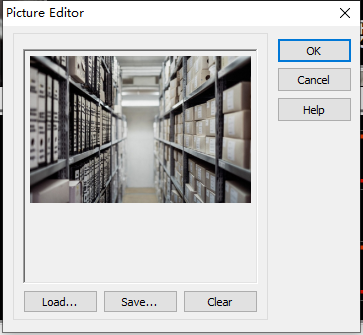
Stretch:设置图片拉伸=True。Height:设置图片高度=480。Width:设置图片宽度=720。Picture:设置显示背景图片。 点击Picture属性右侧的[...]按钮,打开文件上传界面,点击[Load...]从文件浏览器中选择对应的图片文件上传,返回该界面下,待显示出图片后点击[OK]加载图片。
②Shape1属性设置
Height:设置控件高度=262。Shape:设置形状=stRoundRect(圆角矩形)。Width:设置控件宽度=544。
③Panel1属性设置
BevelInner:设置内斜边样式=bvRaised。BevelKind:设置斜边的样式=bkSoft。BorderStyle:设置边界的样式=bsSingle。Color:设置颜色=clBtnText。Height:设置控件高度=217。Width:设置控件宽度=500。
④Label9属性设置
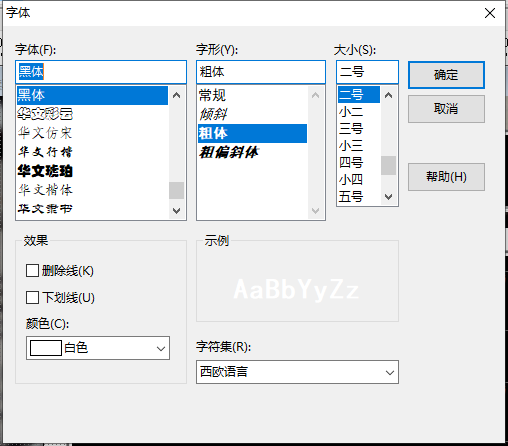
Caption:设置标签文字,设置为开。Font:设置字体。设置内容如下图。
⑤Panel2属性设置
BevelInner:设置内斜边样式=bvRaised。BevelKind:设置斜边的样式=bkSoft。BorderStyle:设置边界的样式=bsSingle。Color:设置颜色=clMenuText。Height:设置控件高度=83。Width:设置控件宽度=404。
⑥Label1属性设置
Caption:设置标签文字,设置为串口读取温湿度。Font:设置字体。设置内容如下图。

⑦Label2属性设置
Caption:设置标签文字,设置为温度。Font:设置字体。设置内容如下图。
⑧Label3属性设置
Caption:设置标签文字,设置为Temperature。Font:设置字体。设置内容如下图。
⑨WidgetLCDLabel1属性设置
Caption.Format:显示格式,设置为00.00。Height:设置控件高度=60。Width:设置控件宽度=209。
⑩Label4属性设置
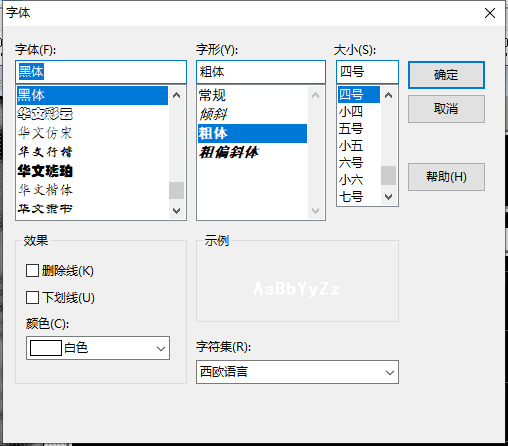
Caption:设置标签文字,设置为℃。Font:设置字体。设置内容如下图。
(11)SwitchButton1属性设置
IsChecked:开关状态,设置为False。SwitchOff:关闭状态时显示的图片。 点击SwitchOff属性右侧的[...]按钮,打开文件上传界面,点击[Load...]从文件浏览器中选择对应的图片文件上传,返回该界面下,待显示出图片后点击[OK]加载图片。

SwitchOn:打开状态时显示的图片。 点击SwitchOn属性右侧的[...]按钮,打开文件上传界面,点击[Load...]从文件浏览器中选择对应的图片文件上传,返回该界面下,待显示出图片后点击[OK]加载图片。
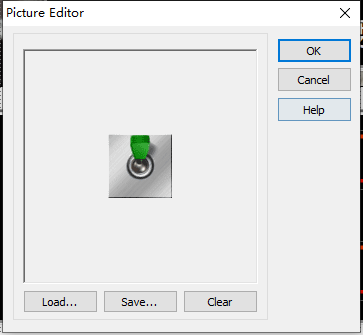
Height:设置控件高度=72。Width:设置控件宽度=68。Stretch:图像是否随控件大小拉伸,设置为True。
(12)Label10属性设置
Caption:设置标签文字,设置为关。Font:设置字体。设置内容如下图。
(13)Label5属性设置
Caption:设置标签文字,设置为温度。Font:设置字体。设置内容如下图。
(14)Label6属性设置
Caption:设置标签文字,设置为Humidity。Font:设置字体。设置内容如下图。
(15)WidgetLCDLabel2属性设置
Caption.Format:显示格式,设置为00.00。Height:设置控件高度=60。Width:设置控件宽度=209。
(16)Label7属性设置
Caption:设置标签文字,设置为%。Font:设置字体。设置内容如下图。
(17)Label8属性设置
Caption:设置标签文字,设置为RH。Font:设置字体。设置内容如下图。
(18)MQTTClient1属性设置
BrokerHostName:MQTT中间件所在设备的IP地址,例如192.168.0.176。BrokerPort:MQTT中间件所使用的端口,默认为1883。
# 7. 程序设计
# 7.1. 程序初始化设置
在程序启动时,启用MQTT连接。
constructor TMyHandler.Create(AOwner: TComponent);
begin
  FThis :=TBaseForm(AOwner);
  FThis.MQTTClient1.Enabled := True;  //启动MQTT连接
end;
2
3
4
5
# 7.2. 事件设置
- (11)SwitchButton1- OnSwitch事件
SwitchButton1在点击时会切换开-关状态,即改变IsChecked属性的值,此时会触发OnSwitch事件,该事件可用于订阅或取消订阅主题。
procedure TMyHandler.SwitchButton1Switch;
begin
  if FThis.SwitchButton1.IsChecked then
  //订阅
  begin
    FThis.MQTTClient1.Subscribe('HUM');
    FThis.MQTTClient1.Subscribe('TMP');
  end
  else
  //取消订阅
  begin
    FThis.MQTTClient1.UnSubscribe('HUM');
    FThis.MQTTClient1.UnSubscribe('TMP');
  end;
end;
2
3
4
5
6
7
8
9
10
11
12
13
14
15
- (18)MQTTClient1-OnPublishReceived事件
MQTTClient1接收订阅消息并解析显示结果。
procedure TMyHandler.MQTTClient1PublishReceived;
//接收订阅消息并显示
begin
  if ATopic = 'HUM' Then
  begin
    FThis.WidgetLCDLabel2.Caption.Value := StrToFloat(APayload);
  End
  else if ATopic = 'TMP' Then
  begin
    FThis.WidgetLCDLabel1.Caption.Value := StrToFloat(APayload);
  End;
end;
2
3
4
5
6
7
8
9
10
11
12
# 8. 运行结果
通过工具栏保存,将程序保存为 sdb 项目文件。
使用鼠标点击工具栏运行(Run),测试运行结果。将图中的拨杆拨向“开”,数值显示屏中的温湿度数据每隔五秒更新一次。