
 邮件发送
邮件发送
# Smart之邮件发送
# 1. 说明
采用SMTP通讯协议,通过客户端实现邮件的收与发等相关功能。
通过范例学习,可以掌握在Smart上使用控件或者函数发送邮件的方法。
# 2. 设计明细
开启Smart智慧控制平台,分别加入下插图之控件。或者通过点击菜单栏[文件]-[打开项目]选择项目打开该范例。
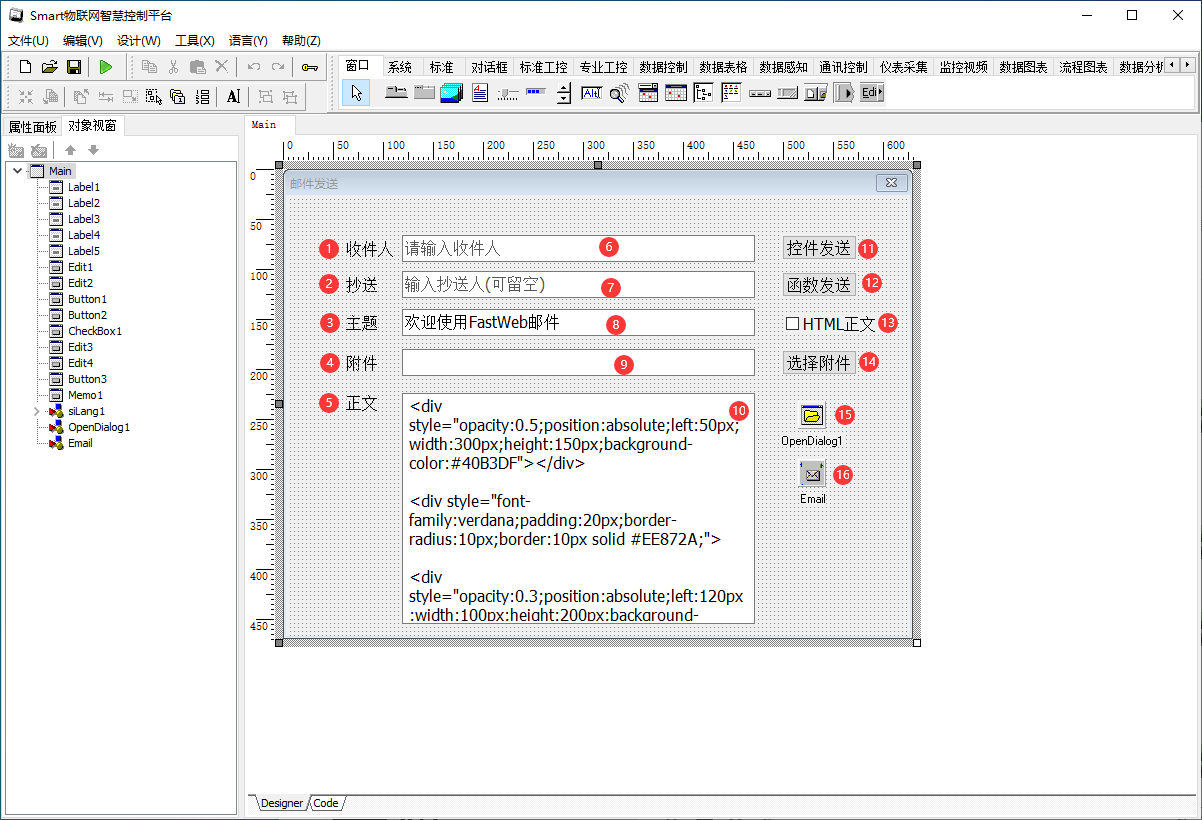
1:TLabel组件,控件名称为Label1。
2:TLabel组件,控件名称为Label2。
3:TLabel组件,控件名称为Label3。
4:TLabel组件,控件名称为Label4。
5:TLabel组件,控件名称为Label5。
6:TEdit组件,控件名称为Edit1。
7:TEdit组件,控件名称为Edit2。
8:TEdit组件,控件名称为Edit3。
9:TEdit组件,控件名称为Edit4。
10:TMemo组件,控件名称为Memo1。
11:TButton组件,控件名称为Button1。
12:TButton组件,控件名称为Button2。
13:TCheckBox组件,控件名称为CheckBox1。
14:TButton组件,控件名称为Button3。
15:TOpenDialog组件,控件名称为OpenDialog1。
16:TEmailMsg组件,控件名称为Email。
Main窗体属性设置
BorderStyle:设置窗体的边框类型,设置为bsDialog。Caption:主窗体标题,设置为邮件发送。ClientHeight:窗体客户区高度=411。ClientWidth:窗体客户区宽度=624。
1:Label1属性设置
Caption:设置标签中显示的内容,设置为收件人。Font:设置字体大小,设置其中的Size为12。
2:Label2属性设置
Caption:设置标签中显示的内容,设置为抄送。Font:设置字体大小,设置其中的Size为12。
3:Label3属性设置
Caption:设置标签中显示的内容,设置为主题。Font:设置字体大小,设置其中的Size为12。
4:Label4属性设置
Caption:设置标签中显示的内容,设置为附件。Font:设置字体大小,设置其中的Size为12。
5:Label5属性设置
Caption:设置标签中显示的内容,设置为正文。Font:设置字体大小,设置其中的Size为12。
6:Edit1属性设置
Font:设置字体大小,设置其中的Size为12。TextHint:设置文本提示信息,设置为请输入收件人。
7:Edit2属性设置
Font:设置字体大小,设置其中的Size为12。TextHint:设置文本提示信息,设置为输入抄送人(可留空)。
8:Edit3属性设置
Font:设置字体大小,设置其中的Size为12。Text:设置显示的文本信息,设置为欢迎使用FastWeb邮件。TextHint:设置文本提示信息,设置为请输入主题。
9:Edit4属性设置
Font:设置字体大小,设置其中的Size为12。ReadOnly:设置为只读模式,设置为True。
10:Memo1属性设置
Font:设置字体大小,设置其中的Size为12。
11:Button1属性设置
Caption:设置按钮显示的文字内容,设置为控件发送。Font:设置字体大小,设置其中的Size为12。
12:Button2属性设置
Caption:设置按钮显示的文字内容,设置为函数发送。Font:设置字体大小,设置其中的Size为12。
13:CheckBox1属性设置
Caption:设置显示的文字内容,设置为HTML正文。Font:设置字体大小,设置其中的Size为12。
14:Button3属性设置
Caption:设置显示的文字内容,设置为选择附件。Font:设置字体大小,设置其中的Size为12。
# 3. 程序设计
# 3.1. 程序初始设置
该程序无初始设置。
# 3.2. 事件设置
- 11:Button1-OnClick事件
点击按钮,使用控件的方式发送邮件。
procedure TMyHandler.Button1Click;
//使用邮件的控件方式发送
begin
  FThis.Email.Host := 'smtp.163.com';
  FThis.Email.Port := 25;
  FThis.Email.Username := 'sample@163.com';
  FThis.Email.Password := 'password';
  FThis.Email.Receipt := True;
  FThis.Email.Address := FThis.Edit1.Text;
  FThis.Email.CCAddressList := FThis.Edit2.Text;
  FThis.Email.Subject := FThis.Edit3.Text;
  FThis.Email.Attachments.Text := FThis.Edit4.Text;
  FThis.Email.BodyHtml := FThis.CheckBox1.Checked;
  FThis.Email.Body := FThis.Memo1.Lines.Text;
  if FThis.Email.SendEmail then
  begin
    ShowMessage(FThis.siLang1.GetTextW('邮件发送成功!'));
  end;
end;
2
3
4
5
6
7
8
9
10
11
12
13
14
15
16
17
18
19
- 12:Button2-OnClick事件
点击按钮,以函数的方式发送邮件。
procedure TMyHandler.Button2Click;
//使用函数的方式发送
var
  Param: TStringlist;
  AttFile: TStringlist;
begin
  Param := TStringlist.Create;
  AttFile := TStringlist.Create;
  Try
      Param.Values['Host'] := 'smtp.163.com';
      Param.Values['Port'] := '25';
      Param.Values['Username'] := 'sample@163.com';
      Param.Values['Password'] := 'password';
      Param.Values['Address'] := FThis.Edit1.Text;
      Param.Values['Body'] := FThis.Memo1.Lines.text;
      Param.Values['Subject'] := FThis.Edit3.Text;
      Param.Values['CCAddressList'] := FThis.Edit2.Text;
      Param.Values['Receipt'] := '1';
      if FThis.CheckBox1.Checked then
        Param.Values['Bodyhtml'] := '1'
      else
        Param.Values['Bodyhtml'] := '0';
      AttFile.Add(FThis.Edit4.Text);
      if paxfunc.SendEmail(Param, AttFile) then
        ShowMessage(FThis.siLang1.GetTextW('邮件发送成功!'))
      else
        ShowMessage(FThis.siLang1.GetTextW('邮件发送失败!'));

  Finally
    FreeAndNil(Param);
    FreeAndNil(AttFile);
  End;
end;
2
3
4
5
6
7
8
9
10
11
12
13
14
15
16
17
18
19
20
21
22
23
24
25
26
27
28
29
30
31
32
33
- 14:Button3-OnClick事件
点击按钮,打开文件选择的对话框。
procedure TMyHandler.Button3Click;
begin
  if FThis.OpenDialog1.Execute(0) then
    FThis.Edit4.Text := FThis.OpenDialog1.FileName;
end;
2
3
4
5
# 4. 运行结果
使用鼠标点击工具栏运行(Run),测试运行结果。
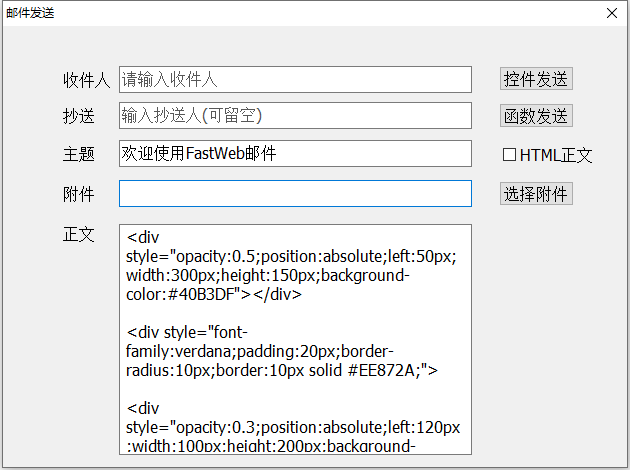
通过工具栏保存,将程序保存为 sdb 项目文件。
在脚本中修改邮件服务器的参数以及用户名密码信息后,可使用控件发送或者函数发送的方式实现邮件发送的效果。